Building a form
Introduction
Our advanced form builder allows you to create custom registration flows tailored to your specific needs. You can define required fields and set up conditional fields that change dynamically based on user input. This guide will walk you through the process.
Accessing the form builder
Navigate to the 'Form Builder' from the sidebar.

General Form Settings
When none of the questions is selected, or you just start with a new form, the settings panel allows you to change.
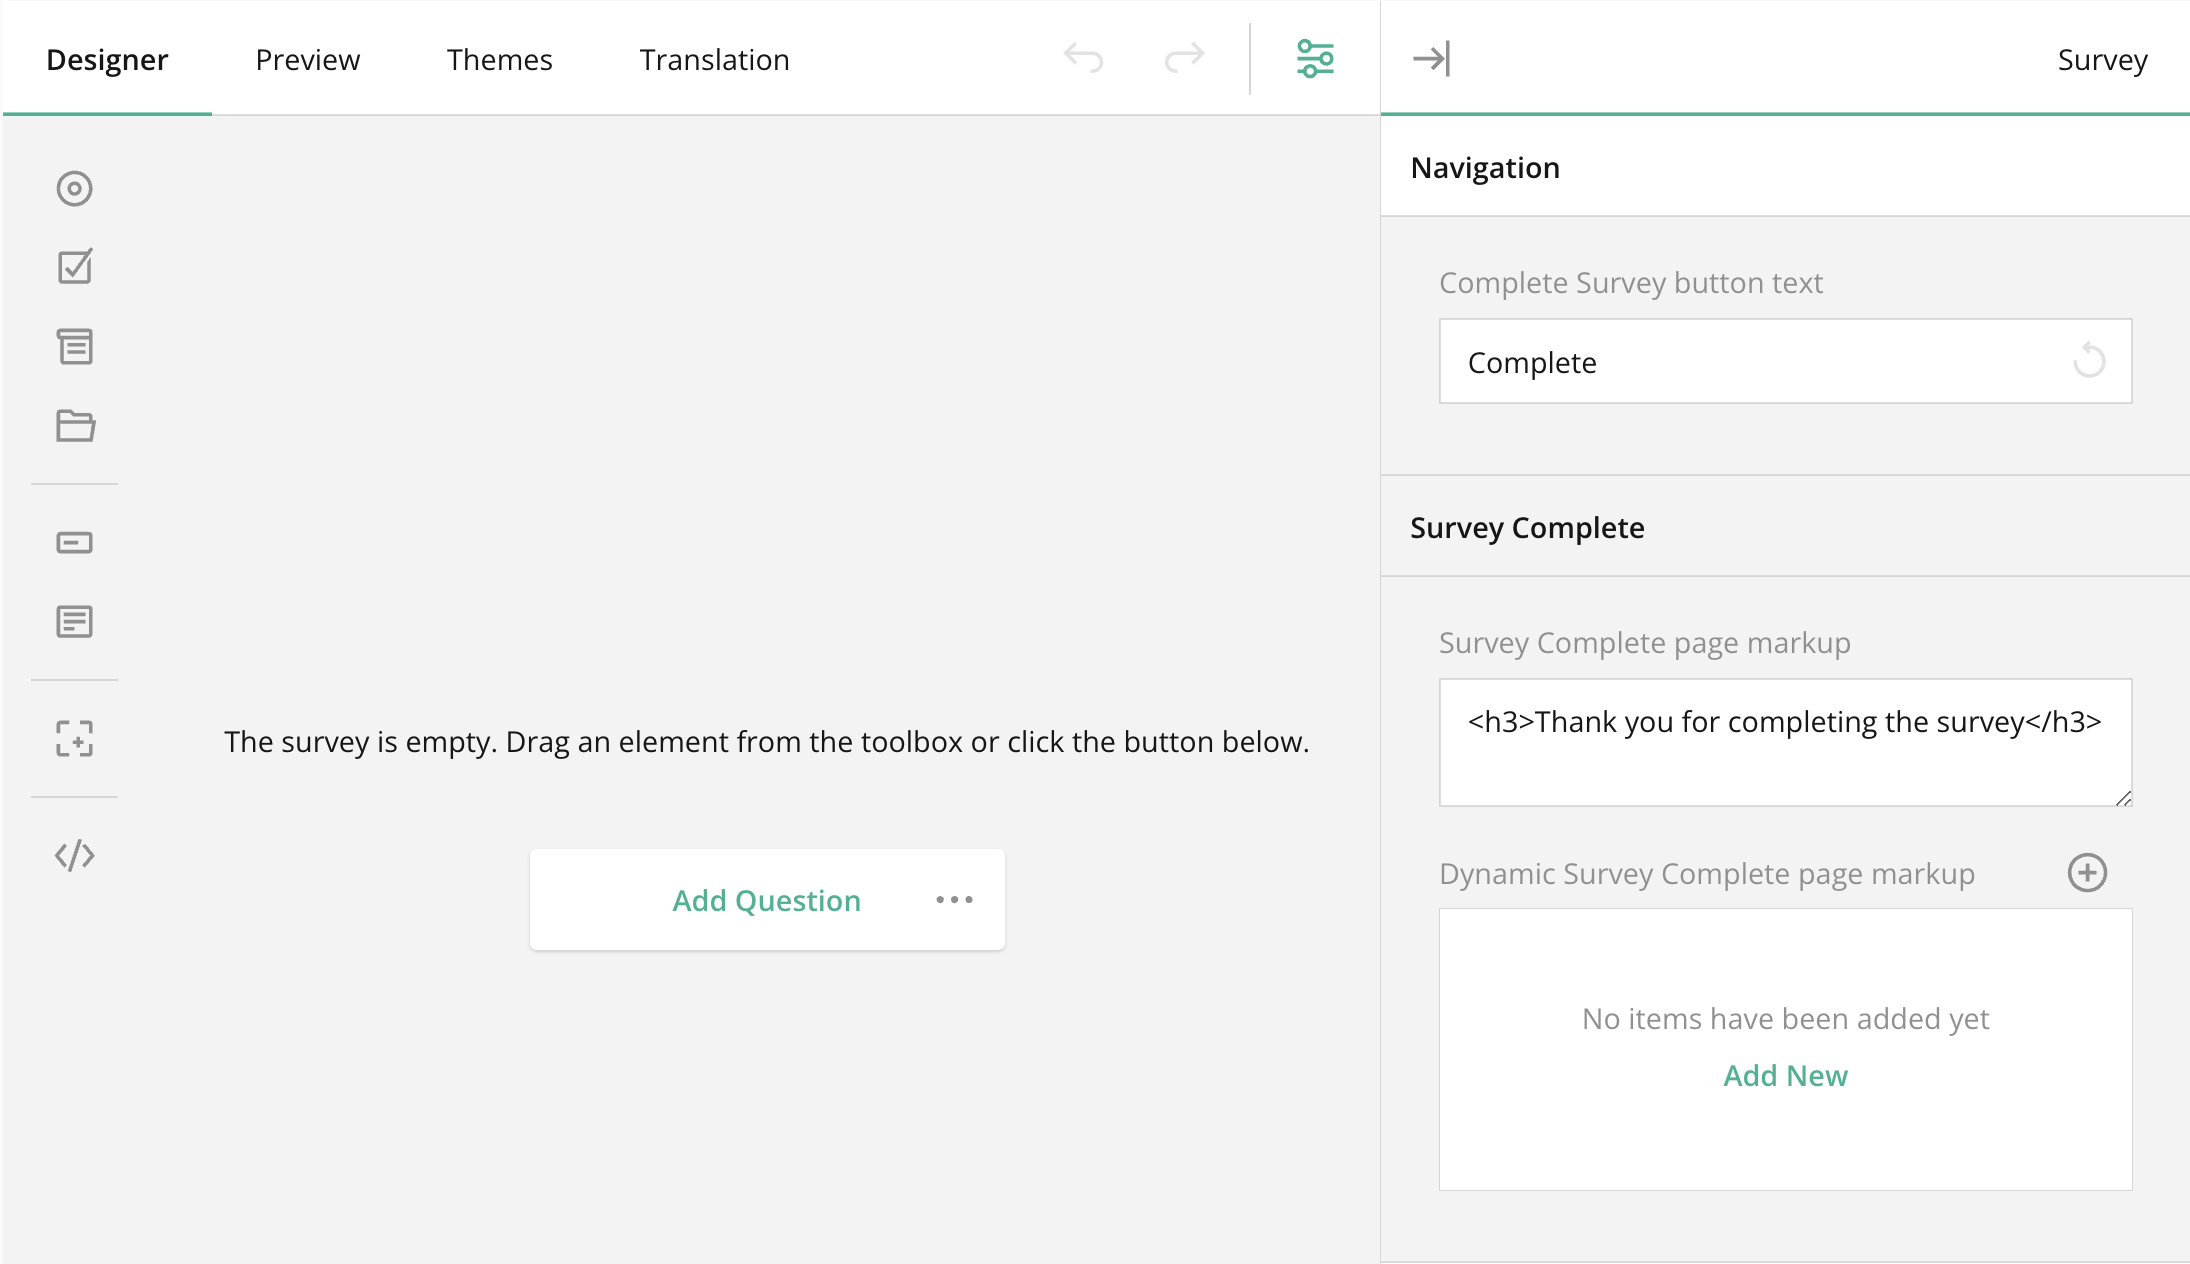
Complete Survey button text
This is the text that will be displayed at the bottom of the form.
Survey Complete
This is the text that will appear once someone has successfully completed the form.
Adding Questions
Click on 'Add question' to add your a question.
General settings
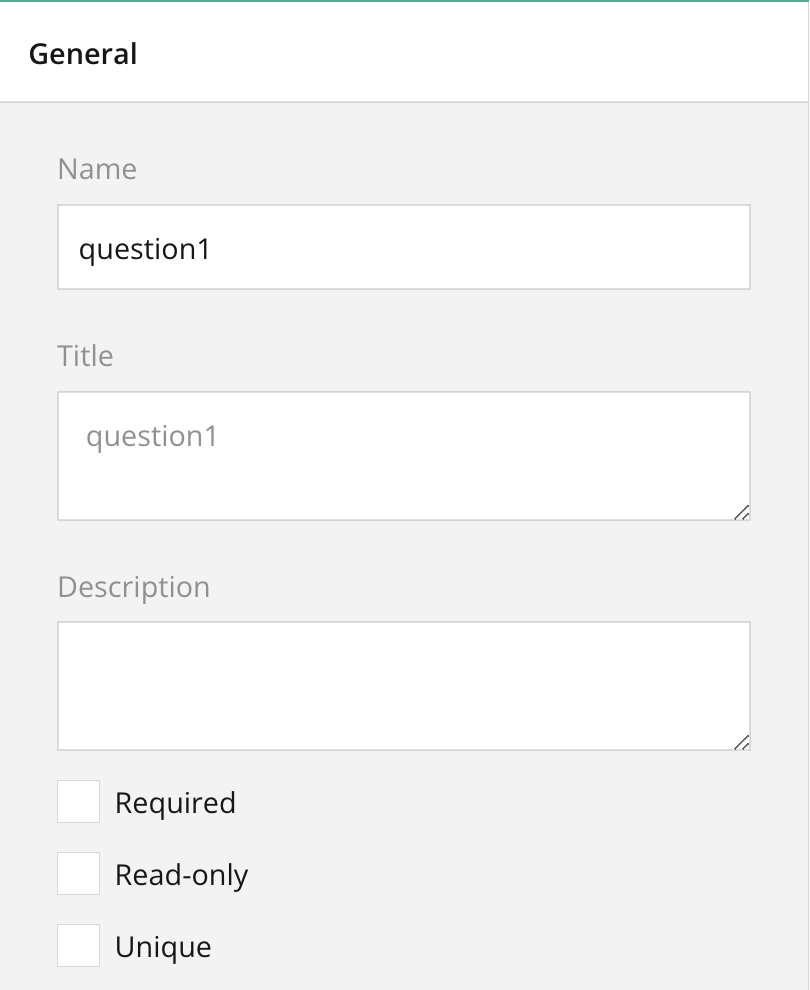
Understanding the name Attribute
Introduction
The name attribute is a crucial component in our form builder. It serves as an internal reference to each field and plays multiple roles, including being used as a column name during data export, a field tag for dynamic emails, and an identifier in the calculation engine for dynamic registration flows.
This guide will explain the significance and applications of the name attribute.
{danger} The name field should be unique
Column Name During Export
When you export form data, the name attribute of each field is used as the column name in the exported file. This ensures that your exported data is organized and easily understandable. Each column in your exported dataset will correspond to a field in your form, identified by its name attribute.
Field Tag for Dynamic Emails
The name attribute is also used as a field tag in dynamic emails. When building automated or dynamic email content, you can use the name attribute to insert field values into your email templates. This allows you to personalize emails based on user input captured through your forms.
Calculation Engine
In the calculation engine, the name attribute is used to determine your dynamic registration flow. The calculation engine uses these names to reference specific fields when performing calculations or applying logic to control the flow of the registration process. This enables you to create complex, dynamic behaviors in your forms based on user input.
Other Question Types
{primary} If you need specific field types, do not hesitate to contact us
Defining a Workshop Selector for Timeslots
Introduction
Defining a workshop selector for timeslots can be achieved by adding a Radio Button field or a Drop-down field to your form.
To find the ID of the timeslot, you can navigate to the timeslot in the backoffice. The ID is shown their.
Steps to Define a Workshop Selector
1. Add the Field to the Form
Start by adding a Radio Button field or a Drop-down field to your form in the Form Builder.
2. Define the Name Attribute
Set the name attribute of the field to indicate that it is a workshop selector for timeslots.
The name attribute should have the following pattern: timeslot_{timeslotID}
Example: timeslot_20
3. Define the Data Storage Attribute
Specify the data storage attribute to inform the form that it is working with timeslots.
The data storage attribute should have the following pattern: timeslot[{timeslotID}]
Example: timeslot[20]
4. Remove All Choices
It's important to remove all choices from the Radio Button field or Drop-down field. This ensures that users cannot select predefined options and allows the field to be dynamically populated with available worskhops.
{primary} This is a work in progress, and soon a custom field type for the timeslot selector will be available.