E-ticket
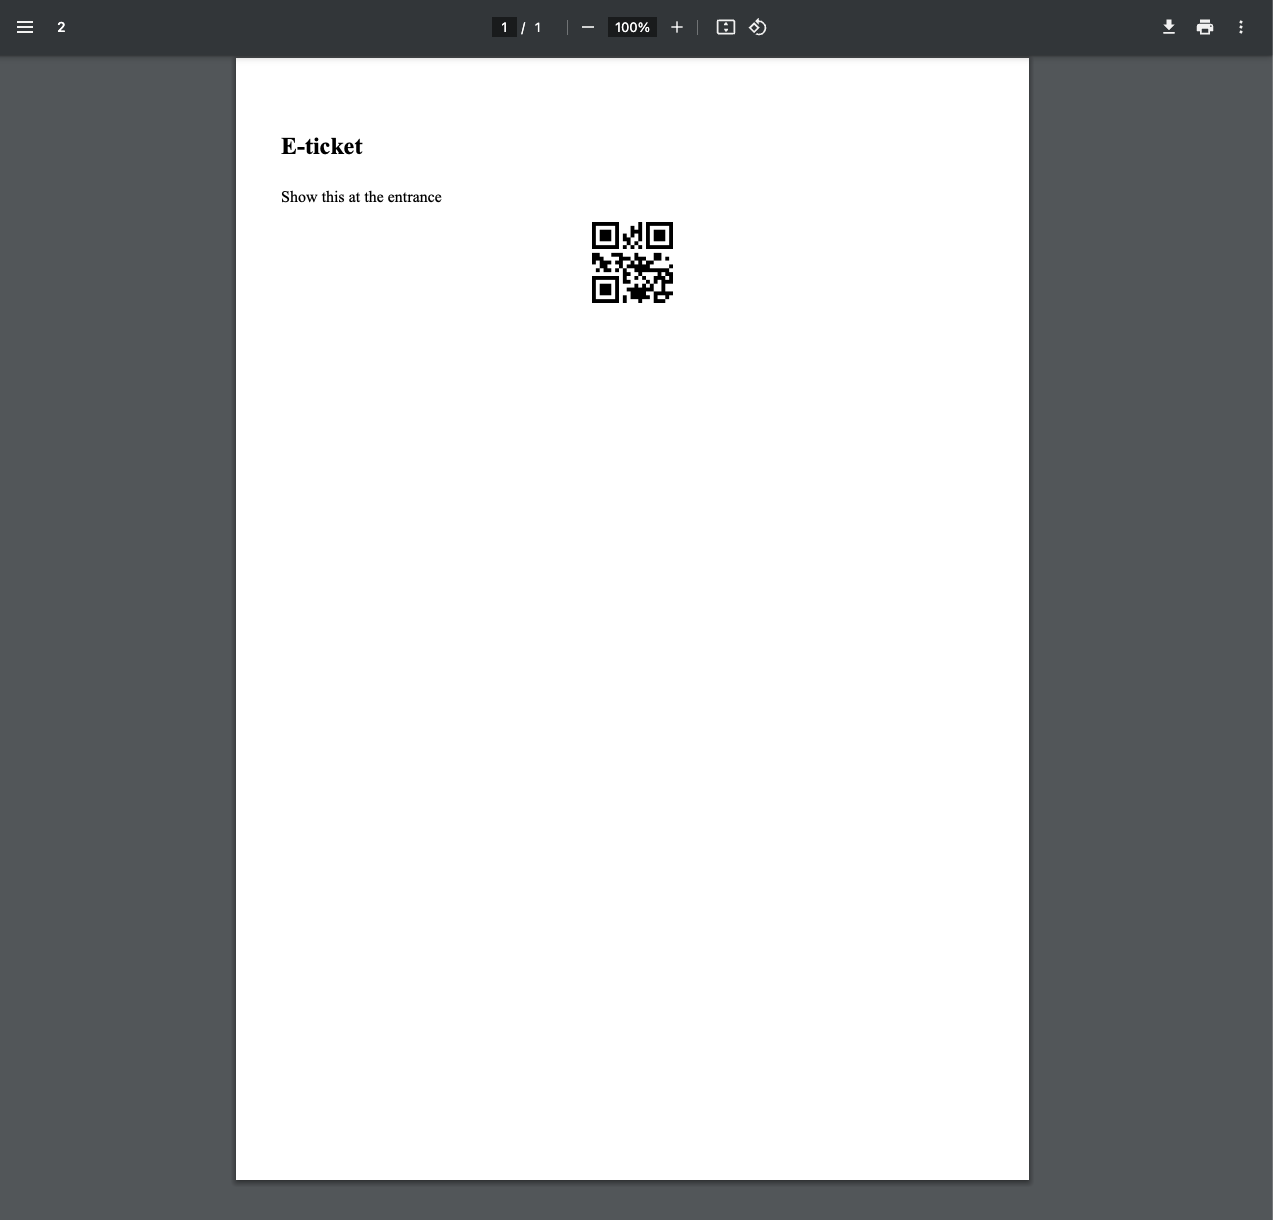
Simple e-ticket
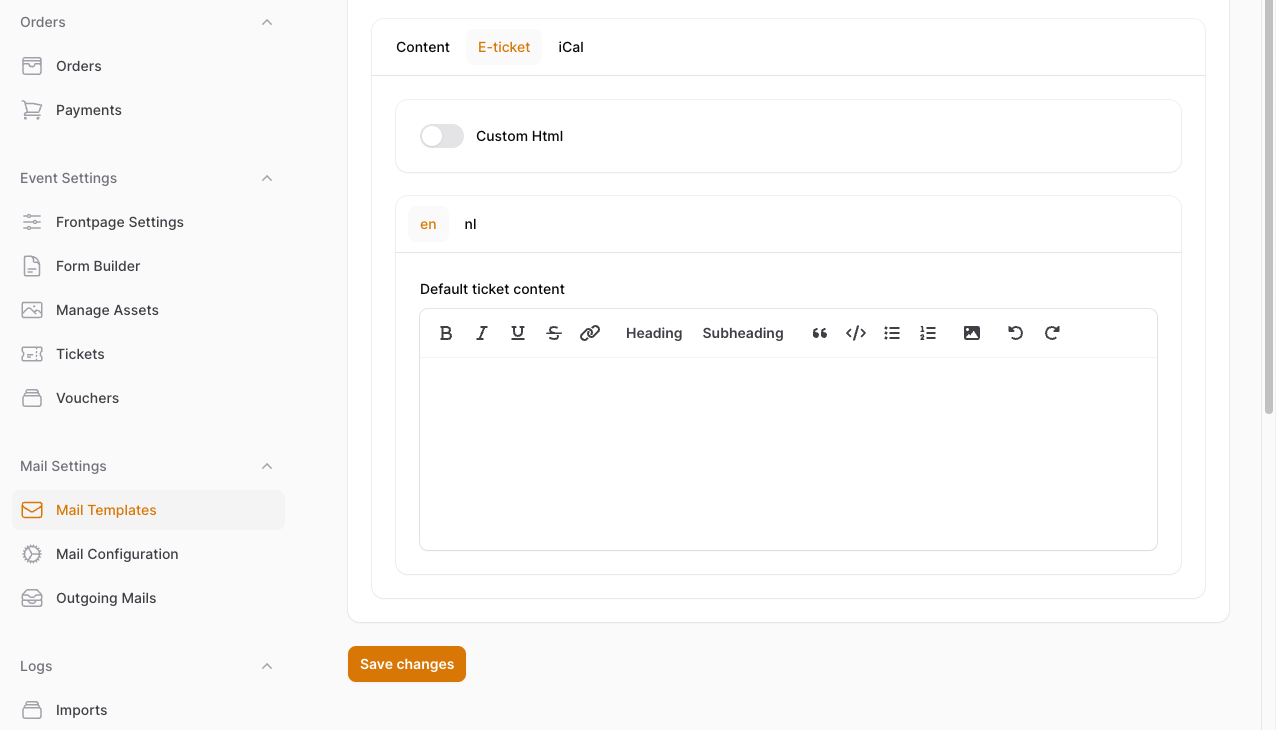
By default, we provide a predesigned template with a description. You can use the text editor to fill in a description.
Here is an example of a default e-ticket. It is formatted to be an A4 printable document.
Custom html e-ticket
To add a custom template, toggle 'Custom html' on. The editor will change, and will now accept html code. It is important
to write a valid html document, and give it A4 dimensions (210mm x 297mm).
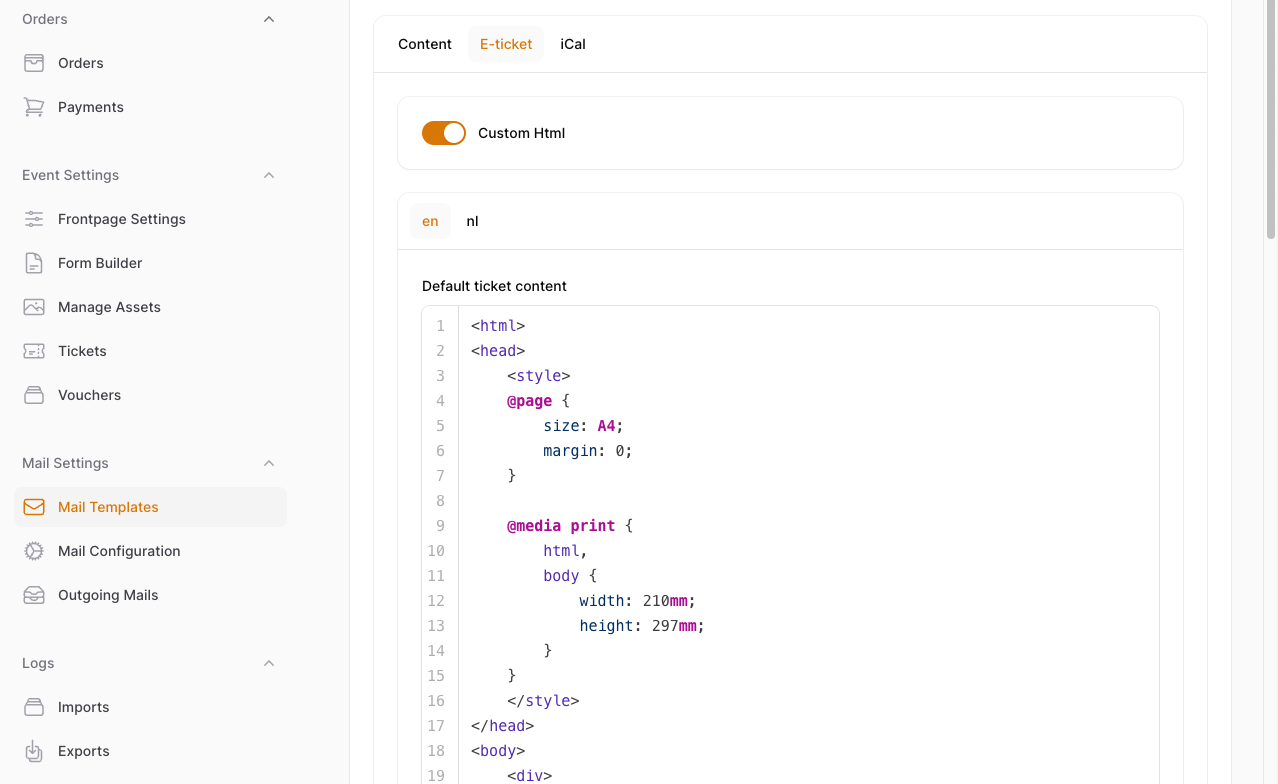
Example of html
<html lang="en">
<head>
    <title>E-ticket</title>
    <style>
    @page {
        size: A4;
        margin: 0;
    }

    @media print {
        html,
        body {
            width: 210mm;
            height: 297mm;
        }
    }
    </style>
</head>
<body>
    <div>
        <h2>E-ticket</h2>
        <h5>Demo event</h5>
        <p><strong>Voornaam</strong>: :attendee.firstname</p>
        <p><strong>Naam</strong>: :attendee.lastname</p>
        <p><strong>Email</strong>: :attendee.email
            <br />
        </p>
        <p>Upon presentation of this ticket,
            you will be granted access to the conference
            and receive your personal badge.
        </p>
    </div>
    </div>
    </div>
</body>
</html>
Add a logo to the e-ticket
To use assets in the e-ticket, you have to upload them in the asset manager. Once they are uploaded, a url to the asset is available. This url can be used to embed an image in your e-ticket.
Template variables
There are a number of variables available to use in your template. See our section about template variables for a full list and usage guide.